How to Build an Online School With Learndash in 7 Easy Steps
The pandemic has forced schools to move online with teachers conducting lessons on zoom calls instead of scribbling on the good old blackboard.
While this transition may take time getting used to, but, it certainly hints towards a future with a prominent e-learning base.
With more schools and universities jumping the e-learning bandwagon, you shouldn’t fall back either.
When it comes to building an online school, using a CMS like WordPress makes it super easy and convenient to create one due to its simplicity.
In this article, we’re going to explain how you can build your online school with WordPress in 7 easy steps:
However, before we dive into the steps, let’s quickly glance over the benefits an online school can fetch you in these strange times.
Benefits of Starting an Online School
Who would’ve thought imparting education without the baggage of carrying heavy books will become a reality so soon?
On those lines, here are some benefits of starting an online school can fetch you:
- Save up big time on Infrastructure and setting up costs, especially, when starting with WordPress.
- Reach out to a wider audience and possibly cater to international audiences as well.
- Facilitate learning from the comfort of your couch.
- Enable students to learn at their own pace without any pressure.
- Create a classroom-like experience with gamification.
- Hire Instructors from any part of the world.
- Cut down on operations costs with available software.
These are just some of the benefits that we’ve mentioned here but, we’re sure you’re probably aware of several such advantages.
The very first step starts with finding a domain name, and hosting for your domain. While there are a lot of domain registrar companies, you’d want to consider a few best. So, once you’ve also decided on the hosting, without any further ado, let’s dive into the 7 step process of building an online school with WordPress.
Once your WordPress website is set up, the very first step is to find a Learning Management Systems (LMS) that will transform your normal website into an education website.
This LMS will give you a platform to create, manage, and administer your e-learning courses and students, thereby, bringing your online school to life.
Now, there are several LMS plugins out there that will do the job, however, we recommend using the premium plugin, LearnDash LMS (the most widely used plugin) for building your online school.
The reasons why we recommend this plugin are because it’s a class apart:
- Its robust features make it easier and convenient to create courses, different types of quizzes, assignments, and drip feed lessons in the most engaging and dynamic way possible.
- With its smooth integration abilities with different plugins, you can sell and monetize your courses effortlessly through Subscriptions, Memberships, Course bundles, etc.
- As an admin, you get to have more control over your courses and students with the ability to group students, monitor course progress, revoke access, etc.
With that being said, if you’re an existing school moving online – your curriculum for the entire year is probably planned already. All you have to do is feed it into the LMS, thereby, saving you tons of time.
On that note, choosing the right LMS is absolutely essential and LearnDash ensures your students get the best of the learning experience they deserve.
Setting up LearnDash starts with installing the LearnDash plugin like any other plugin in WordPress, however after that the important part is configuring the settings. Follow the steps below :
- Once you have uploaded and activated the zipped plugin of LearnDash, you’ll find a menu created.
- You can click on General Settings to edit the default settings for design and content, the Admin User.
- Custom Labels can be set based on how you want to refer to your learning material. For example, unlike LearnDash, you can refer to ‘Topics’ as ‘Modules’ or refer to ‘Quizzes’ as ‘Tests’. You get the picture.
- Under PayPal Settings set your PayPal Id in case you want to handle payments through your LearnDash setup.
LearnDash now integrates a drag-and-drop course builder using which you can create Course, Lessons, Topics, and Quizzes visually, without ever leaving the page. Though in this kind of a website, the most of your course building is to be done by your teachers/instructors, but the process is the same for all as below.
If you’re setting up a new course:
- Navigate to LearnDash LMS > Courses
- Click the “Add New” button at the top of the page
- Click the “Builder” tab in the top navigation bar

To get started with creating a lesson on LearnDash:
- Navigate to LearnDash LMS > Lessons
- Click on the lesson you’d like to edit -or- click the Add New button
- You will automatically land on the Lesson page tab
In LearnDash, lessons contain topics. The new part here is handling the ‘Topic Display and Content Settings’ on your LearnDash Installation:
- Navigate to LearnDash LMS > Topics
- Click on the topic you want to edit
- Click on the Settings tab at the top of the page
- Locate the section titled “Display & Content Options”

When people land on your online school website, you want them to be impressed instantly, don’t you?
Well, sure LearnDash makes course creation and management easier, however, it is equally important to focus on the User experience, Learning experience, and the Design if you really want people swooning over your e-learning website.
So, having a theme with a clean design and a simple User Interface ensures that your online school website looks attractive and makes your visitors feel the vibe as soon as they arrive on your homepage in order to engage and induce them to explore deeper into your website.
Moreover, implementing a theme that supports real-time teaching with capabilities to conduct live lessons, web seminars, and connecting with students, thereby enabling a classroom-like experience will add to your students learning experience.
Now, to fulfill these objectives, there are a plethora of themes you can use but, we recommend using a theme that is specifically designed for LearnDash in line with its functionalities so that there are no compatibility or functionality issues whatsoever.

Just like any physical school structure, your e-learning website will need to radiate a school-like environment.
Whether you’re building an online school from scratch or taking an existing physical school online, having different teachers on-board to teach and manage their respective subjects and students is a must to ensure the success of any school, regardless of it being online or offline.
For e.g: Having different subject expertise/teachers teaching respective subjects like Math, Science, History, English, etc. online would replicate a physical school-like structure.
To implement this, you will need a plugin that allows the creation of Instructors or Teachers.
When it comes to LearnDash, at present, the WISDM Instructor Role is the only plugin that lets you add multiple Teachers/Instructors to your LMS allowing them to create and manage their own courses, quizzes, lessons, assignments, and students enrolling in their subjects.
You can use this plugin to delegate the course creation and management responsibilities to your Instructors without compromising on your admin privileges.
It also facilitates online communication enabling Instructors/Teachers to give feedback to students regarding their performance.
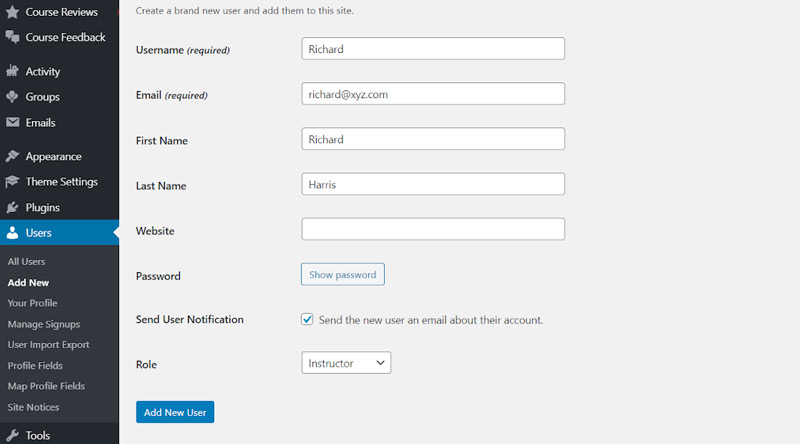
Once you’ve installed this plugin, you as an admin have the ability to add/restrict various functionalities that are attributed to the instructor. Let’s see what you can do :
1. Add as many number of teachers(/instructors) to your LMS
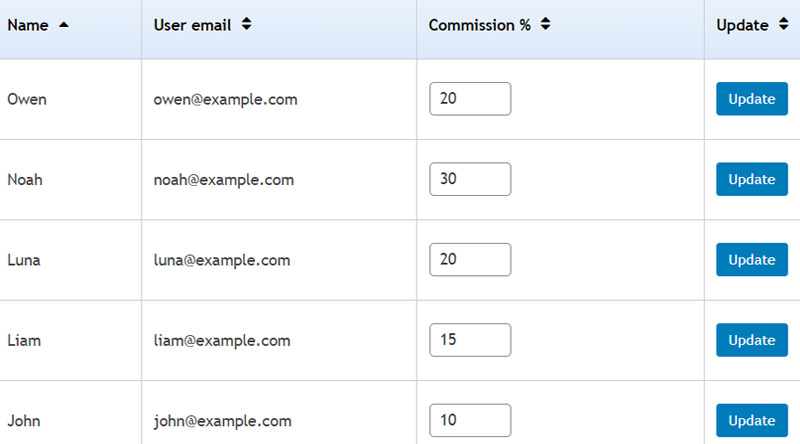
2. Control all activity of the instructor/teacher
As an admin, you can check the “Save as Draft” option to disallow Instructors to publish content automatically. This gives you the option to review courses being created and publish them manually.
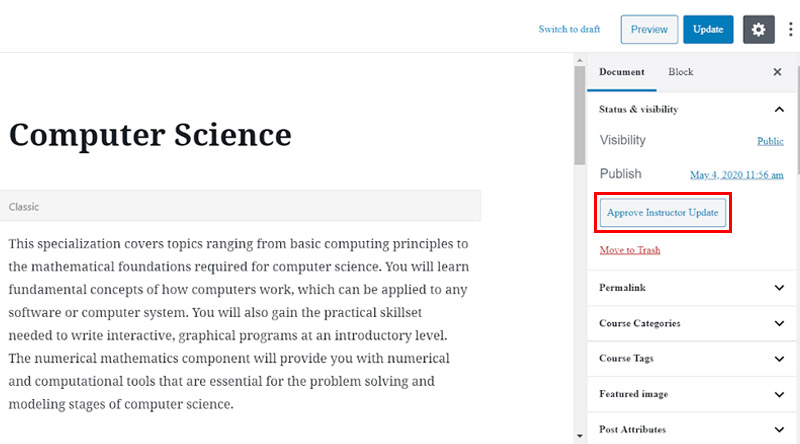
3. Benefit from the Instructor Dashboard
The good part of the plugin is that instructors get a personalized dashboard to work with LearnDash and WordPress. The simple interface makes it easy for instructors who do not have WordPress knowledge to use the platform.
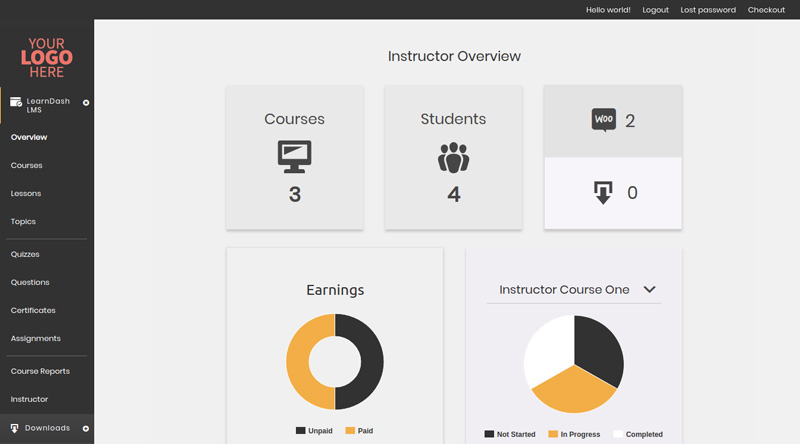
4. Allow Teachers/Instructors to work independently
You can give your instructors the complete freedom to build courses and course hierarchies based on their requirements. They can create quizzes, score attempts and evaluate assignments. You don’t need to be involved at every step. Freeing up your time to market your school and other activities.
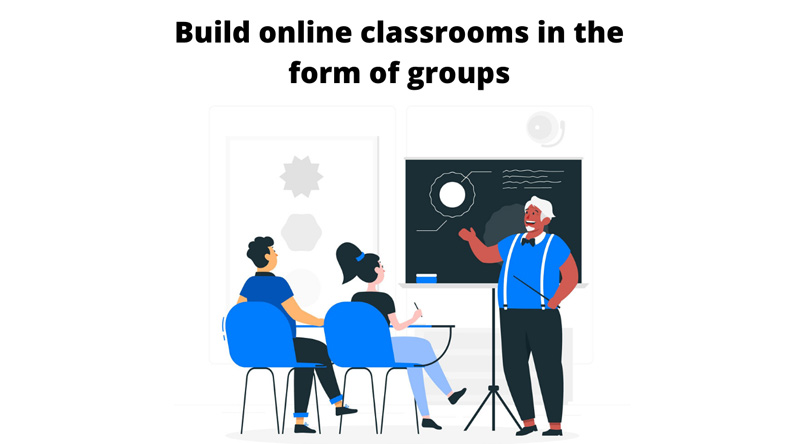
Similar to classrooms in schools, an online school also needs a systematic way to manage/register students in each course.
Even though LearnDash allows you to manually create groups for the courses you’re offering, assign group leaders and add students to that group, however, managing this task alone can get quite tedious and time-consuming as and when the number of students and courses increase.
For e.g: Adding hundreds of students to the Science group manually can be quite tiring. Imagine doing this for multiple courses!
Having said that, the need to register and manage students who belong to a particular course by putting them in a single group/batch is a must in order to avoid confusion and maintain an organized structure.
To tackle this problem, it helps to have a functionality to enable automatic creation of groups and group leaders who can bulk enroll students into their course groups and track their progress and other activities through the group itself.
When it comes to your online school, it’s advisable to empower your eachers/Instructors with this functionality in order to speed up the student registration process, thereby, leading to an increase in course signups.

Remember checking pop quiz tests in school?
Well, when it comes to e-learning, sure you’ll be conducting quizzes but, the manner of evaluating the quiz tests for obvious reasons will change and this calls for a need to have a method on your LearnDash LMS to evaluate these quizzes efficiently.
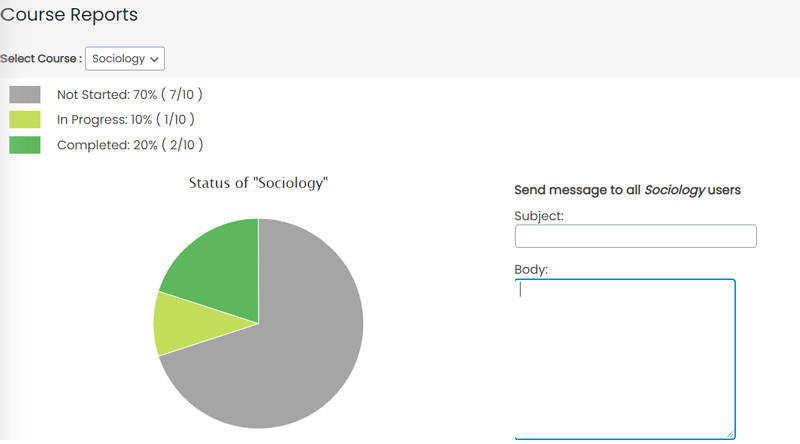
For this purpose, having a system to generate detailed quiz reports and its analysis will help in measuring and evaluating the performance of your students giving you an opportunity to identify the gaps in students’ understanding of the course and implement the needed changes accordingly.
Considering the importance of this functionality, you can check out plugins that can help you achieve this goal which is extremely vital for the success of your online school.

In a physical school setting, it is easier for your teachers to engage students in their content because they’re present right in front of their eyes.
Whereas, in an e-learning environment, it can get quite difficult to keep the students engaged with your course content, especially, with the usual shenanigans of quizzes, assignments, videos, etc. which, to be honest, can get quite boring.
So, in order to provide a captivating learning experience to your students, it is essential to create interactive content through gamification options which will keep your students motivated and engaged with your courses.
You can use programs like H5P to create and use interactive HTML5 elements like:
- Flashcards
- Charts
- Presentation
- Memory games
- Interactive videos
- Timelines, etc.
Fortunately, your Instructors won’t struggle to create interactive courses given H5P’s smooth compatibility with Instructor Role.
In addition, you must also implement gamification options like Badges, Certificates or Points to reward your students whenever they complete a quiz, a course or achieve a significant milestone during their journey.
Doing this will attract more students and encourage the existing ones to work harder with extreme enthusiasm and zeal.
It is this interactive content and gamification options that’ll make your online school stand apart from the rest.
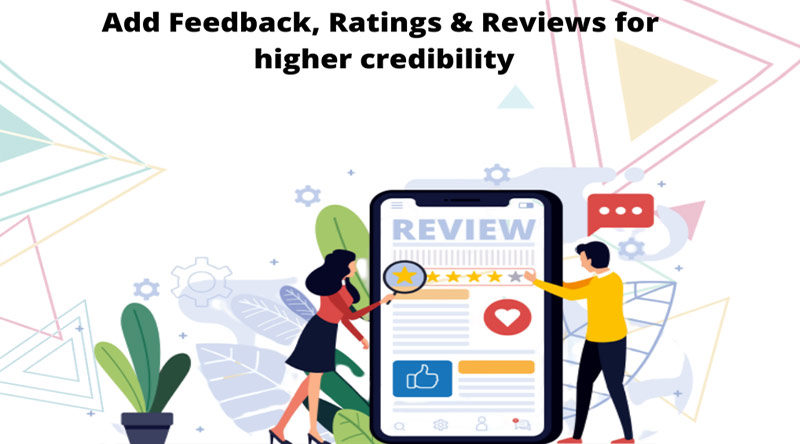
This brings us to the last step of building your online school.
When you want more students to sign up for your courses, you have to find a way to showcase the quality of your courses in order to attract more students.
The best way to do this is by having a Feedback, Ratings, and Reviews mechanism on your LearnDash LMS which can boost your course credibility leading to an increase in your course sign-ups.
Having relevant Ratings and Reviews on your courses will enable your potential students to make an informed decision resulting in fewer refunds against your courses.
Furthermore, allowing your existing students to clearly express their views regarding your courses in the form of Feedback will help you to improve your courses and involve them in the process as well.
In order to stay ahead of your competitors in these troubled times, we recommend you to focus on increasing the course sign-ups on your online school with a Feedback, Ratings, and Reviews system for LearnDash.

We know we mentioned the previous step to be the last one, Apologies!
You can skip this step if you wish to since we’ve already covered the basic elements and functionalities of building an online school.
However, we figured marketing your courses is an important element if you want to boost your course sign-ups, and too often, this function is left as a mere afterthought.
If you want the netizens to know that you’ve arrived with an online school, you’ve to get out there and reach out to them through all means possible!
So, in order to market your courses, you can tap into the following channels:
- Facebook groups
- YouTube videos
- Quora
- Influencers
There are plenty of different marketing channels available, but these are some of the basic channels you can use to market your courses and reach out to potential students which, in turn can lead to an increase in your course sign ups and profits.
Endnote
We hope we’ve provided you with enough information to build your own online school with WordPress using LearnDash LMS.
While you’re at it, remember that the above steps can be implied to any form of online school you’re trying to build – Martial Arts, Dance Academy, Music Schools, etc.
Let us know if you’ve any questions, in the comments below, we will try our best to answer them.
We hope this article was helpful. If you liked it, feel free to check out some of these articles as well!


