Simple Steps to Install WooCommerce Plugin
Did you know that WooCommerce plugin powers 28% of all active online stores on the web? This makes it the single most popular e-commerce solution in the world. Not just that – this incredible plugin just keeps getting better.
If you’re running a WordPress website and you want to add a shop to it, you’re probably thinking of doing it using WooCommerce, simple and powerful solution for every online shop type.
After you install WordPress plugin, create tags and categories, add products or display grouped products, and if there is a need easily edit code as per your needs with simple Woocommerce hooks.
In this article, we will show you how to properly install and activate WooCommerce plugin on your website in just a few simple steps.
Step 1: Download and install the WooCommerce plugin
Obviously, the first thing you’ll need to do is to go and download the plugin. In your Dashboard, navigate to Plugins, and click on Add New. Now, type WooCommerce in the search bar. Once you’ve located the plugin, click on Install Now. When the installation process is complete, go ahead and Activate the plugin.
Step 2: Basic Information
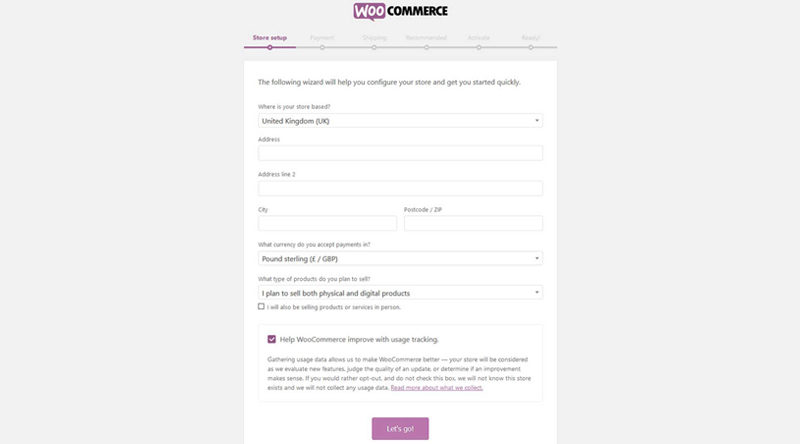
Once you have successfully installed and activated the plugin, you will need to set it up. You will be automatically redirected to the plugin’s setup wizard, which is rather straightforward and intuitive. You will have to enter some essential info, such as the location of the store, address, currency, type of products you intend to sell, and so on.
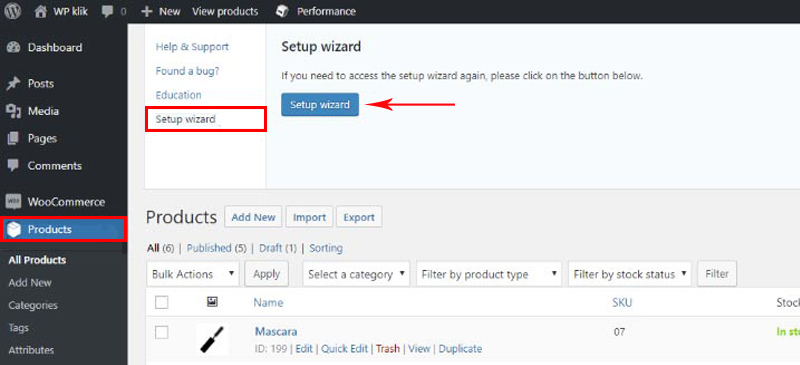
Note that in case you have already used WooCommerce and uninstalled it for whatever reason, the wizard won’t launch automatically. You’ll have to launch it manually by clicking on Setup wizard, located under Products > Help > Setup wizard.
Step 3: Payment Options
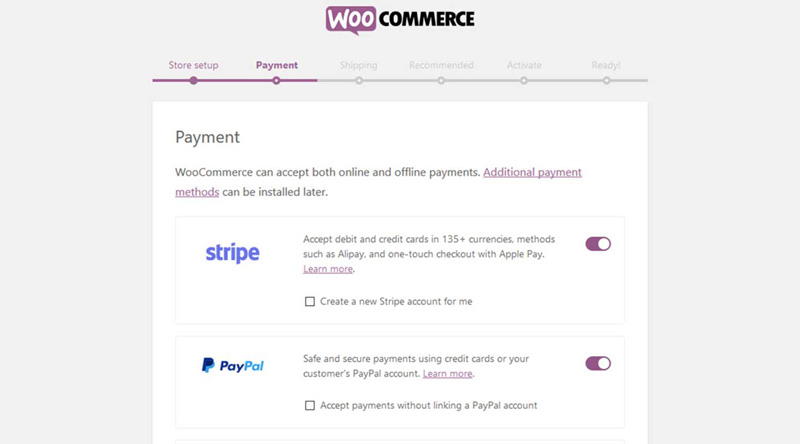
Next, you will need to set up your preferred payment options. Remember, you can also change everything later, if need be. Select the payment gateways you want to use, for instance Stripe or PayPal. Note that the WooCommerce plugin will download and install these payment plugins. Complete these actions and click on Continue.
Step 4: Shipping Options
You will now need to set everything regarding your preferred shipping options. Select the shipping zone and method and pick which countries you want or don’t want to ship to.
Note that if you go for the Flat Rate option, you will have to set a fixed price to cover your shipping costs, both for your shipping zone and for other zones. For instance, if your location is in the UK, that will be your shipping zone and one rate will apply, but there will be another rate for shipments sent to other zones, say USA or Greece.
You should also select your preferred weight and dimensions units (kg, cm/pound, inch…).
Step 7: Final Step
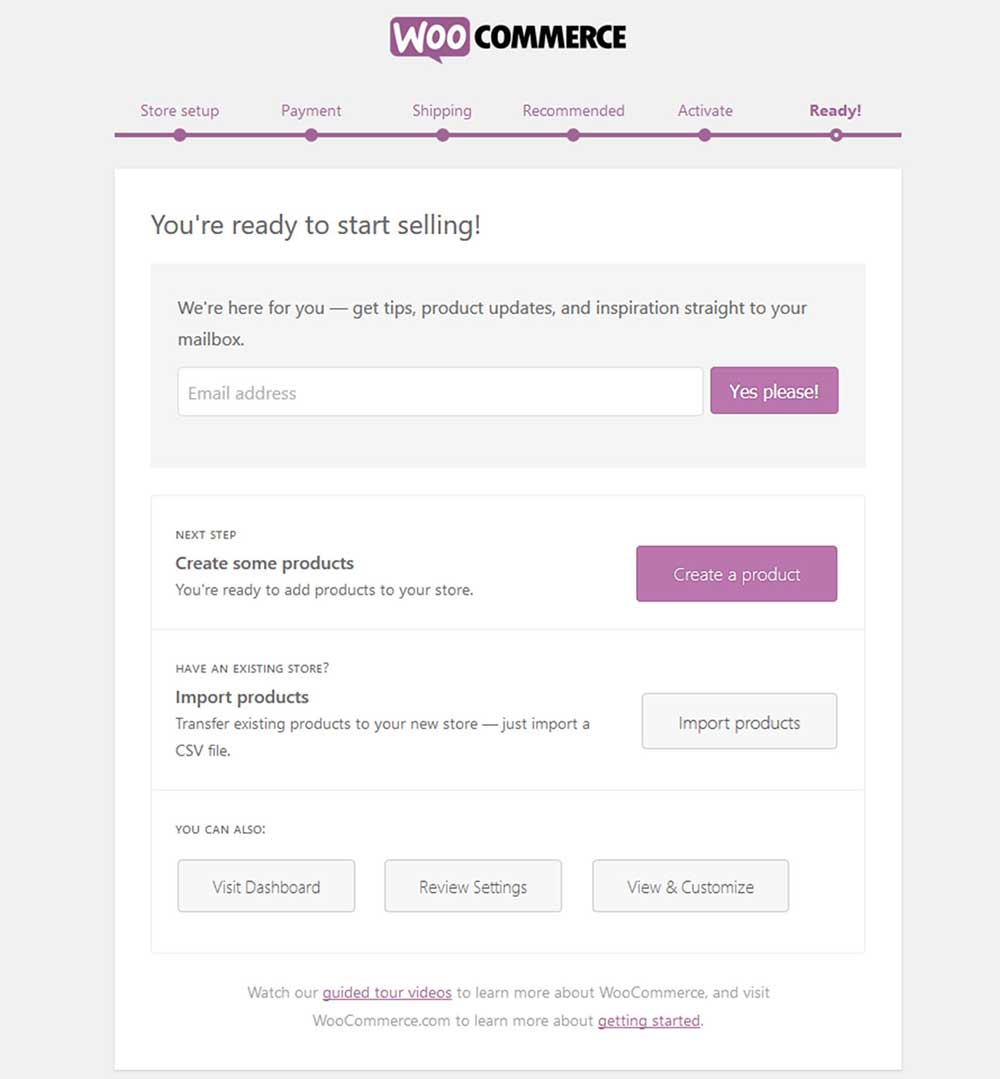
The final step of the installation and setup process for the WooCommerce plugin is where you need to provide your email address so that WooCommerce can update you on all the news and updates. You will also have to specify whether you want to add some products immediately. However, we recommend going back to your Dashboard by clicking on Visit Dashboard or, better yet, to Review Settings.
Also Read…
Step 8: Changing your Woocommerce Settings
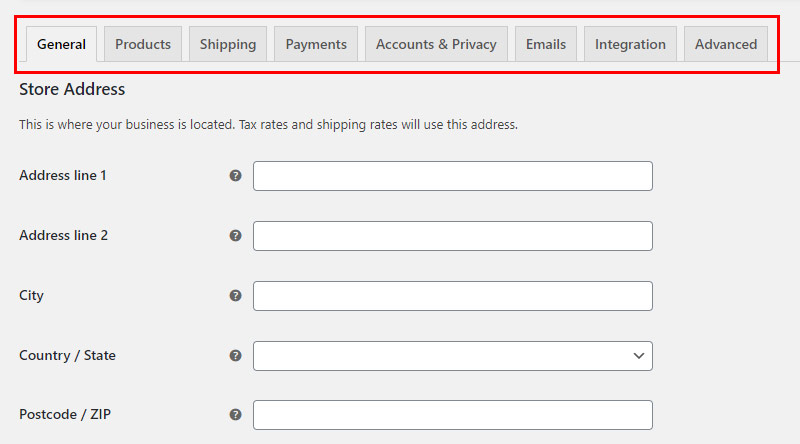
In the future, whenever you want to change anything about your WooCommerce plugin or your online store, just go to WooCommerce in your Dashboard menu and click on Settings.
The settings are sorted as shown below. You can use these to change the settings you’ve made upon installation, from products to shipping, payments and so on.
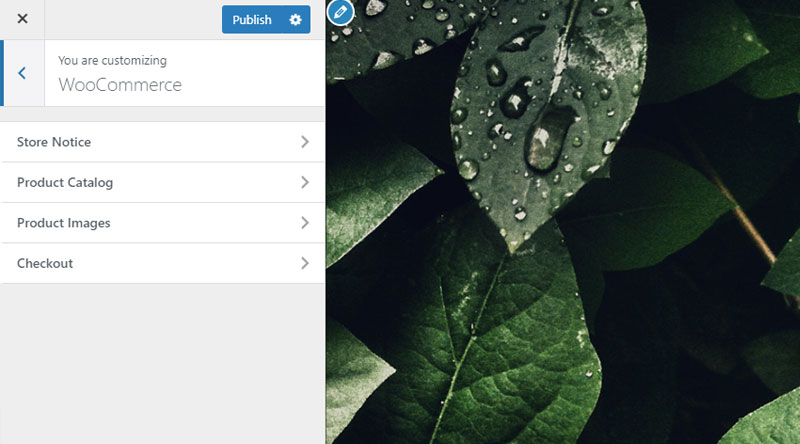
For more customization options, you can go to Appearance in your Dashboard menu and pick WooCommerce from there.
The following options will appear:
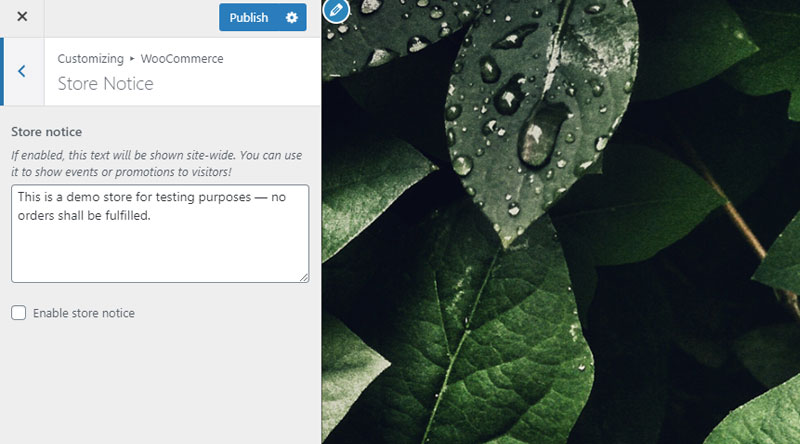
The Store Notice option is used to add a custom notice and display it to your shop visitors. This is a useful feature for promotions, special offers, news and similar situations.
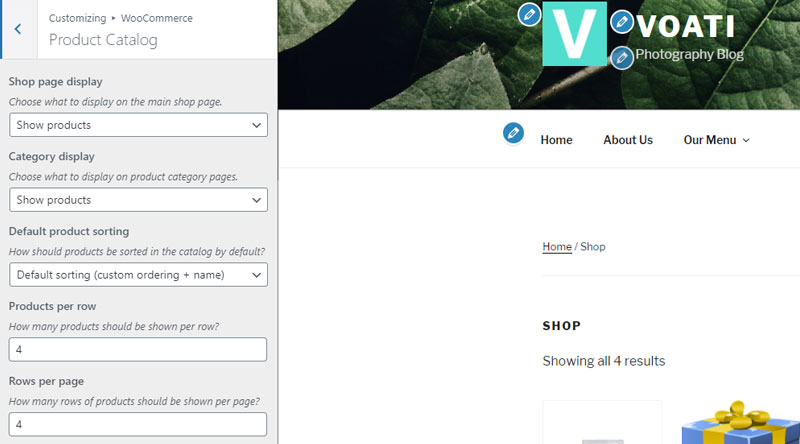
The Product catalog offers useful options such as Default sorting of your products or how many products you want to be shown per row and row per page.
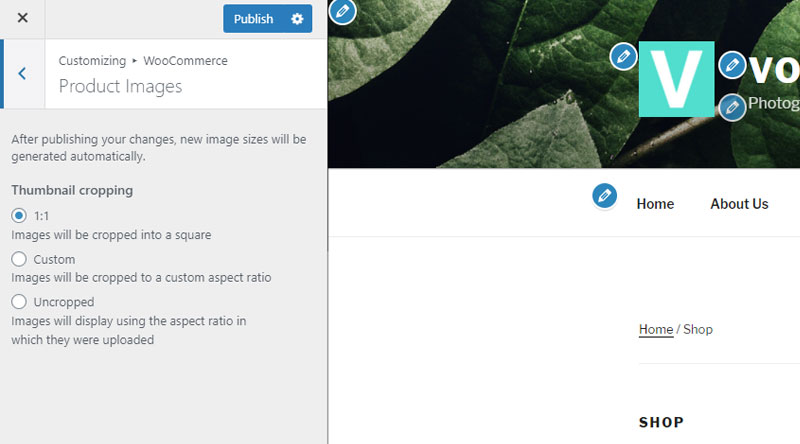
The Product Images option allows you to set how you want your product images to be displayed, specifically, whether you want them cropped or not.
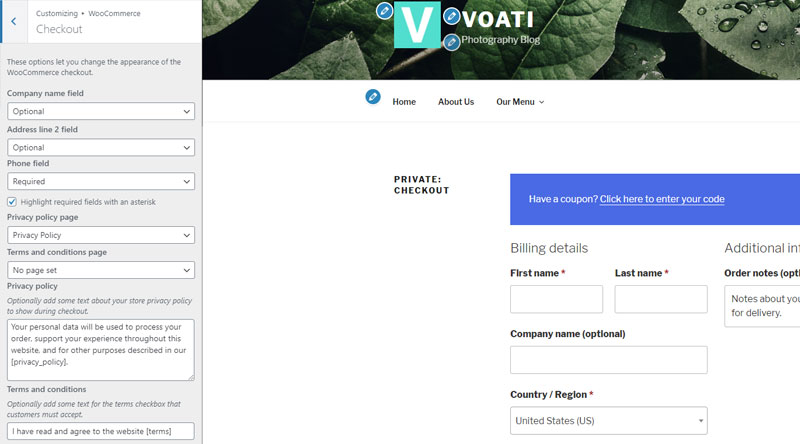
Next, the Checkout tab offers different options for customizing your checkout page.
Once you’re done setting up everything just the way you want, click on Publish to save the changes. Remember, you can always return to these options and change them again in the future, if you need to.
Your next step should be to properly add products to your store before you start selling them. This is a very important step, so pay close attention. In case you need any sort of assistance with setting up your shop, you can always check out our article on how to set up an online store with WordPress.
As you can see, installing, activating and setting up the WooCommerce plugin is a relatively short but definitely simple process. Also, there are numerous WooCommerce plugins that cover not only basic WooCommerce features, but also tons of advanced shop options that can uplift your sales. Now that you know how to do it, go ahead and start your online store today!
We hope this tutorial was helpful. If you liked it, please feel free to check out some of these articles as well!


