How to Use WooCommerce Attributes to Design a Top Shopping Experience
If you are planning on opening an online store but you’re not sure where to start, you should know that creating a shop in WordPress with the WooCommerce plugin is really something that anyone can do. Not only can you create a functional store, but you can also create a beautiful, unique, fantastic online store that is perfectly in line with your vision and goals. All you have to do is pick a quality WooCommerce WordPress theme. You’ll also find plenty of comprehensive tutorials to take you through the whole process step by step. Since there are a lot of options for customization, you will see that creating an online store is not only easy but also a fun and enjoyable experience.
Although creating a WooCommerce store is simple, many people tend to oversee WooCommerce attributes, either because they are not sure how to use them or because they are not even aware of all the possibilities that come with them.
But, we have it all covered in this text. Continue reading to find out:
The universal goal of any shop is to sell. Whether it is a physical or virtual product, the seller’s goal is to present the product to the buyer in the best way possible and to make as many sales as possible. There is basic info about the product that is necessary to be displayed along with the product and then you may have noticed that some shops offer more descriptions about the product. This extra information that is not necessary and gives a more detailed description of the product characteristics are called attributes (extra data to your WooCommerce products.)
Attributes can describe physical characteristics of the product (such as color, material, size …) but they can also indicate some technical information (eg, whether the product is available and when the product will be available if not …). They can be used for any additional information you want to communicate with customers.
Attributes are assigned to specific products, for each product separately. The process of adding an attribute to a product is preceded by creating the attribute itself and adding value to the attribute.
The added attributes of the product will be visible to customers in the Additional Information tab on the product page itself.
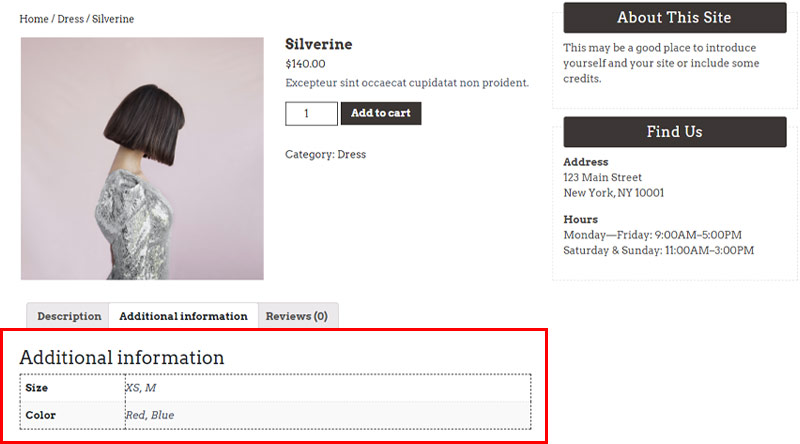
As you can see, the Size (with values XS, M) and Color (with values Red and Blue) attributes have been added for this product.
As mentioned above, attributes are used when we want to give customers some additional information about the product. But, they have two more significant roles.
Attributes are important to us for creating a variable WooCommerce product. It often happens that the notion of attributes is confused with these variable products. Attributes are information only. For example, the buyer will see that there is a product of sizes S and M but will not be able to choose which size he wants. He will have to contact the seller in some other way to let him know which size he wants. Variable products are actually products that the customer can choose based on some attributes. These products use attributes to give the customer some choice, so variations depend on the attribute, not the other way around. The first step in creating a variable product is to create the attribute.
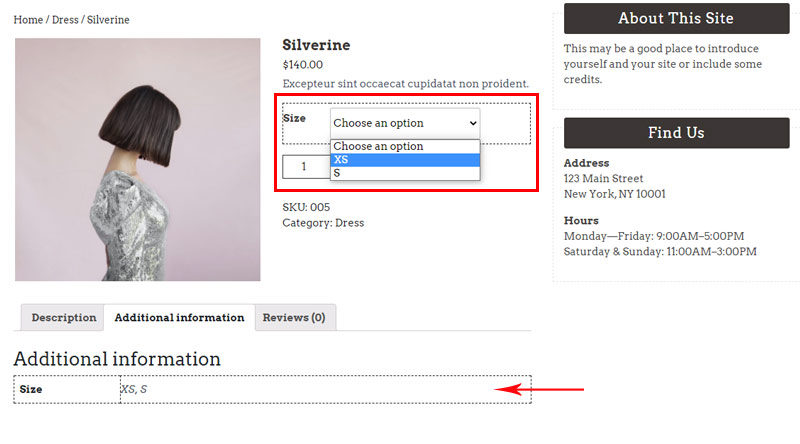
You can see in this image how it looks like when attributes are used for the purpose of a variable product and how when their only purpose is to give more information about the product.
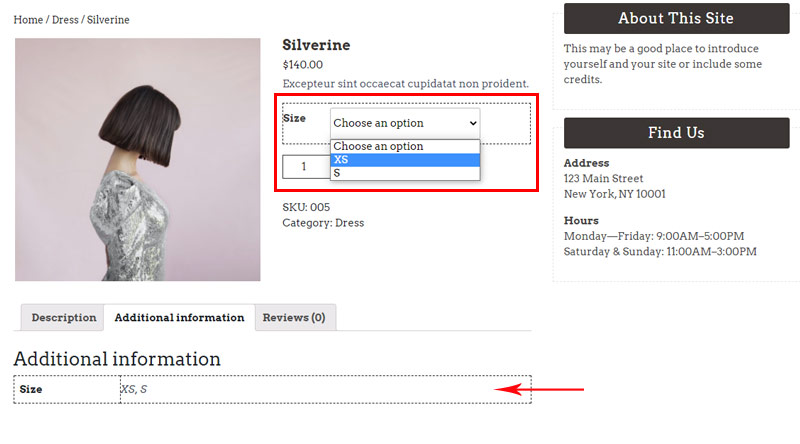
In this example of ours, the attributes are still displayed as information in the Additional Information tab, and when used for the purpose of a variable product, the users are enabled to choose the product size.
Another useful role that attributes can play is in filtering products. This is done with a special widget for filtering products by attributes based on created attributes (and of course attributes added to products) that allow customers to view products by certain parameters. We will explain later how to add this widget in more detail.

No matter which function you assign to an attribute, the first step is to create it. There are two ways to create attributes. The first and the one we recommend is the creation of global WooCommerce attributes – they can be used by all products for any purpose. Another way is to add attributes to a specific product – these attributes will only apply to that product and will not be able to be used in the filter widget.
To create global WooCommerce attributes go to Products > Attributes.
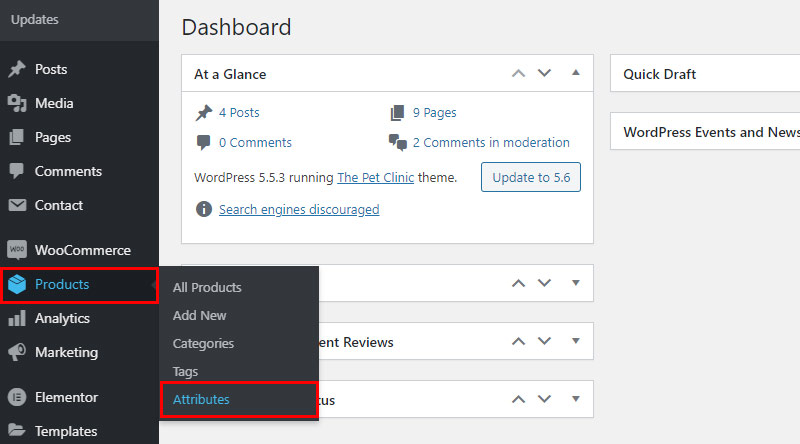
This is where we create an attribute and assign a slug to it (the slug will be automatically assigned to it if we miss to add it). Also, when creating an attribute, we can choose whether it will be on the archive page or not (Enable Archives? checkbox). In the case where we have more than one attribute, we can determine how the attributes will be sorted.
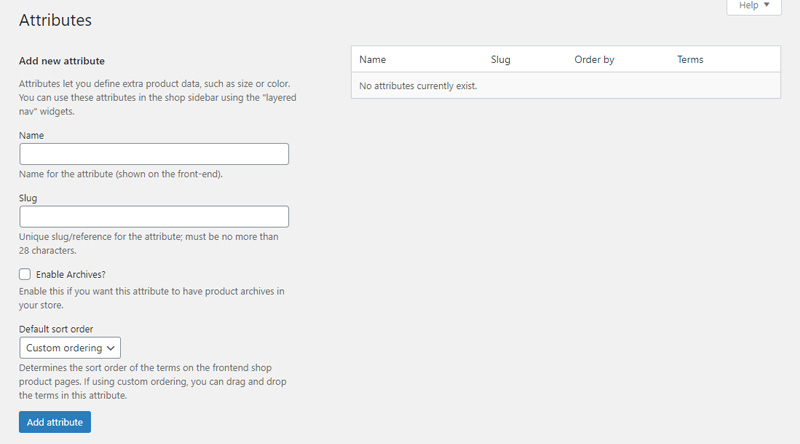
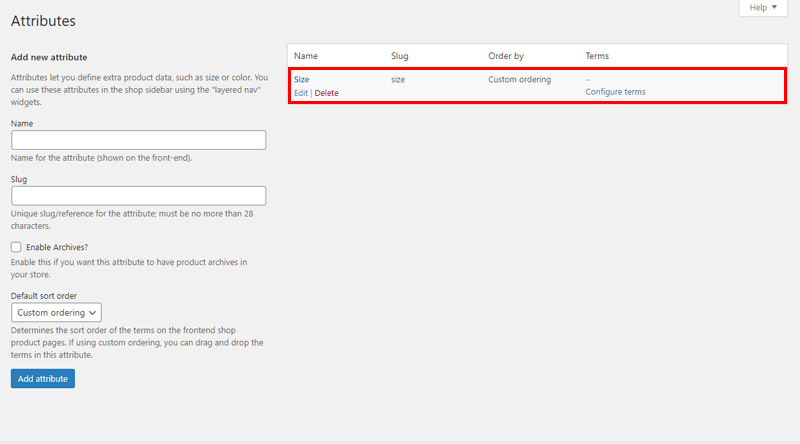
In this case, our desired attribute is Size and when we have added it, it appears in the attribute list. Of course, if necessary, we can edit it. What is needed now is to assign values to the attribute. Configure terms is where we add values to attributes.
We assign a name to the values, the name is what will appear on the product itself, and we assign a slug (again, if we do not specify it, it is automatically added). We can also add descriptions to the attribute values. This description is useful for us – the authors of the shop, as in most cases customers are not able to see it because the themes in which these are shown on the product itself are rare.

When we have entered all the data we go to Add new, in this case, we added Size, so this is where you see your attribute name.
Another way to add attributes, as we have mentioned earlier, is to add them to the product itself. No matter what the product type is, you always add an attribute in the same way. Note that, the attribute given in this way refers only to the product on which it is added, it cannot be added to another product, you have to create it for each product separately.
In the Attributes Tab, we go to Custom product attribute and choose Add.
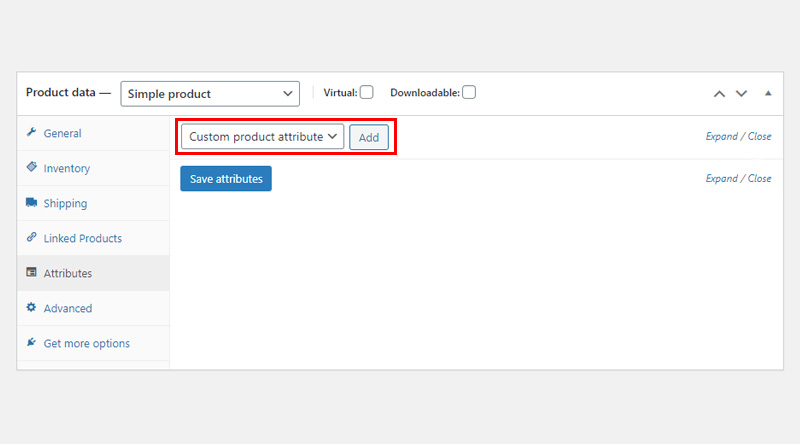
A field opens in which we add the Name attribute on the left, and the values are separated by a line | on the right. When we add all the desired values we need to click on Save attributes. This way we can create as many attributes as we want and add as many values to them as we need.
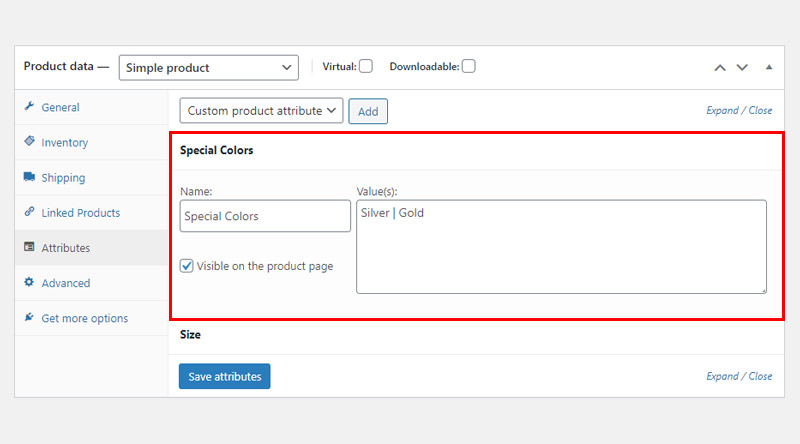
When a product has both the custom attribute and one that is created for all the products, the customer won’t be able to notice any difference between the two. Both attributes are in the Additional Information tab.
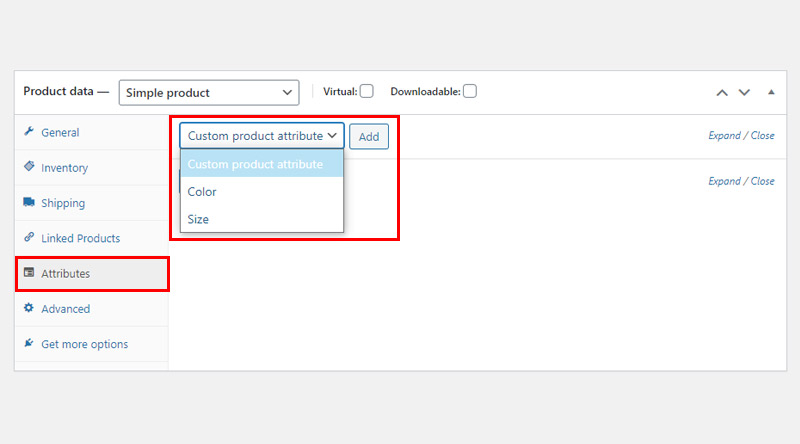
Assigning attributes to products is very simple. Each product type can have attributes. When you go to the product to which you want to add attributes, the Attributes tab is where all the options you need are. In the section above, we explained how to add a completely new attribute to a specific product, but you can also add the global attributes that you have already created. Here you will find a list of all available attributes.
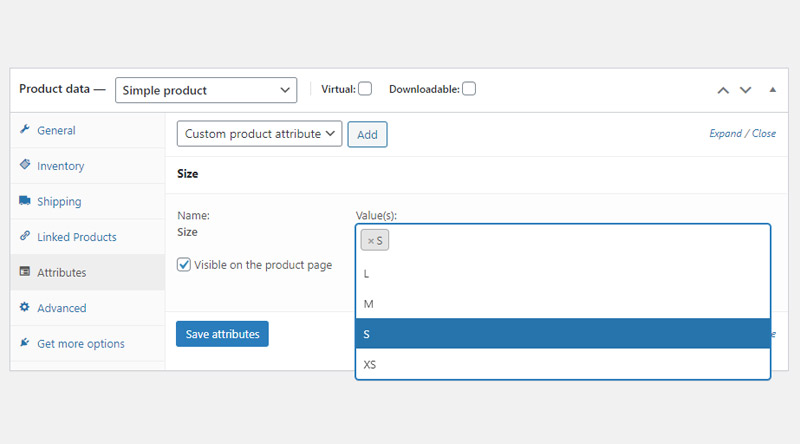
When you select the attribute that you want and add it, the attribute values will be available to you and you can select the ones you need. For example, our Size attribute has four values, but that does not mean that every product that has this attribute must have all values. That’s great in this case, as we can choose which values we need for each product.
Visible on the product page – only when this option is checked the attributes will be visible on the product page itself.
We can add as many attributes to each product as we need and as many values as we need.
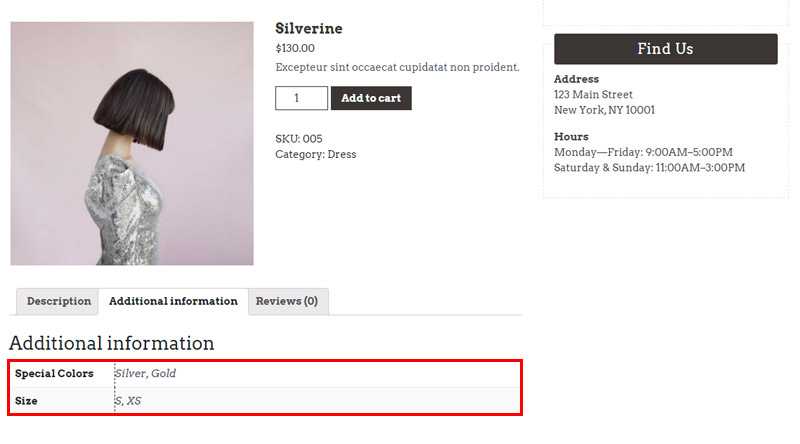
The Visible on the product page option, which also appears here if checked, means that the information will be displayed in the Additional Information tab. But this option most often is not checked when attributes are used for a WooCommerce variable product because then the attribute’s primary purpose is different.
By default, we have also the option to insert the widget for filtering products by attributes into some of the theme’s sidebars.
To do this, simply go to Appearance > Widgets. Drag the widget to the desired sidebar and adjust the parameters. One inserted filter is for one attribute. We can insert multiple filters if we want to enable filtering by multiple attributes.
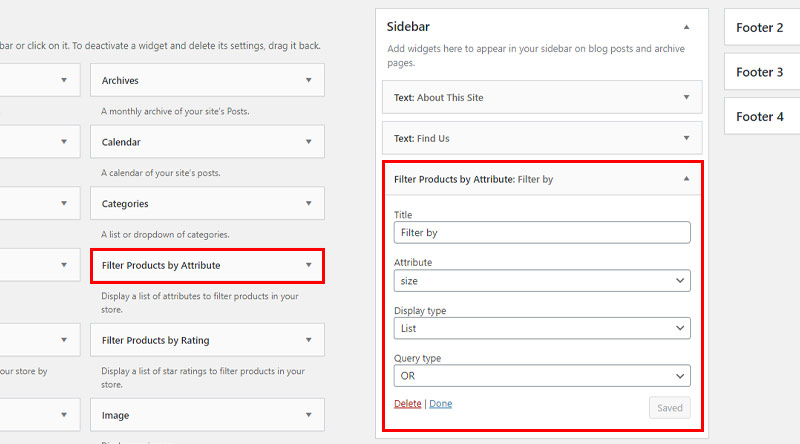
As for the filters, we have a Title at our disposal where we choose what will be our filter name, we choose the attribute for which we want the products to be filtered. You can choose between the Dropdown and List Display types, and there’s also the Query type that allows us to specify whether the user can enter multiple desired values for filtering or just one.
This is how it looks like live:

In Conclusion
Attributes are a great way to enhance user experience on your website and now that you understand how and why you should use them, there is really no reason not to. Remember that when you create an online store, you also create a shopping experience and you should use every opportunity you have to show your customers that you put the effort to provide them quality both in terms of products and service. If you have any questions about the WooCommerce attributes or want to share how they worked out on your site, don’t hesitate to write to us in the comment section!
We hope that you found this article to be helpful. If you liked it, please feel free to check out some of these articles as well!


