Creating WooCommerce Product Tags and Categories
Assuming you have already installed and set up your WooCommerce plugin, your next step should be to adding new products and give them product tags and categories. Furthermore, you can create grouped products or even edit code as per your needs. Have in mind that adding proper tags and categories to a product can have a significant impact on your sales. For this reason, make sure to follow these simple steps in order to get everything right.
Step 2: Setting Up Product Categories
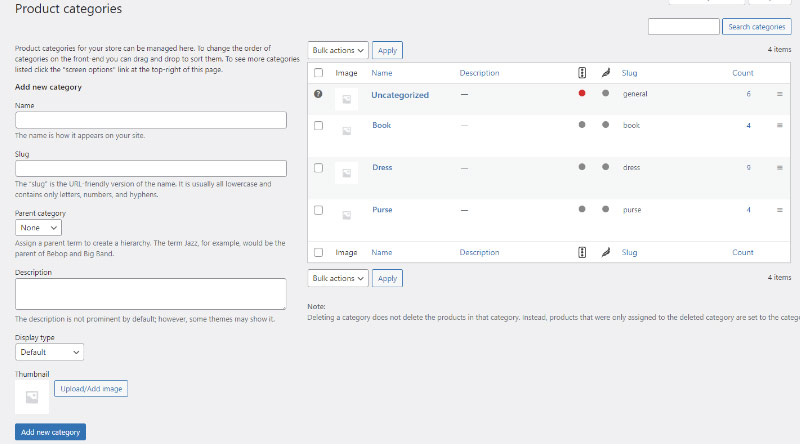
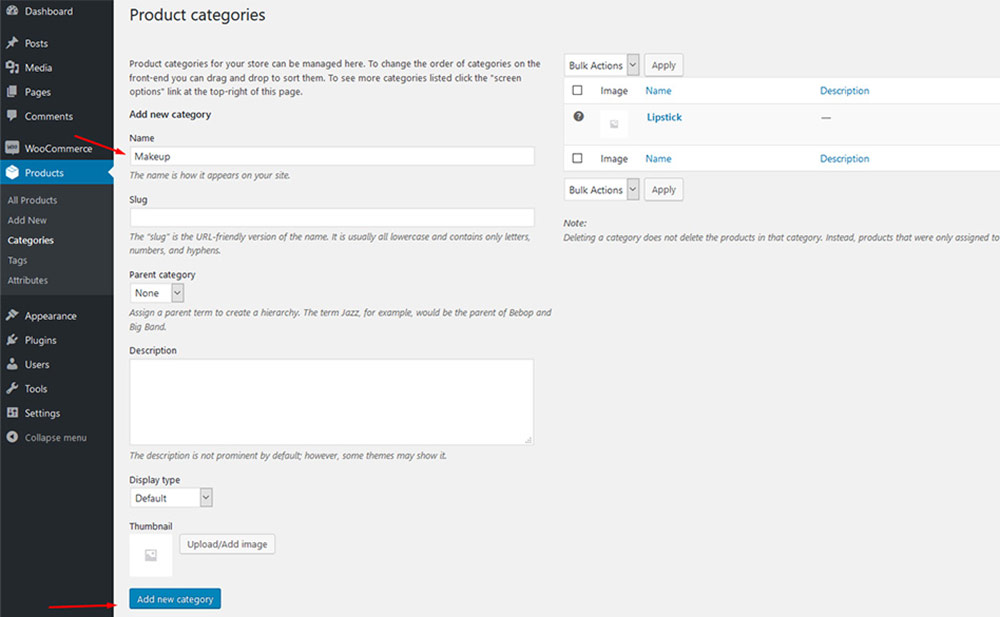
You will now see a familiar screen. To your left, you add new categories. To the right, you have the list of existing categories.
You will see a category called Uncategorized. That one is there by default and you can’t actually delete it. However, what you can do is rename it and set it to fit one of the categories you intend to use.
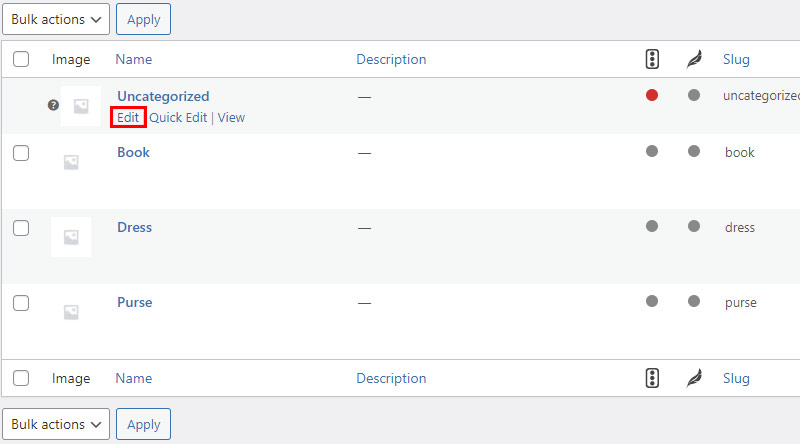
For instance, let’s say you’re creating a beauty product shop. Simply hover over the category and click on Edit.
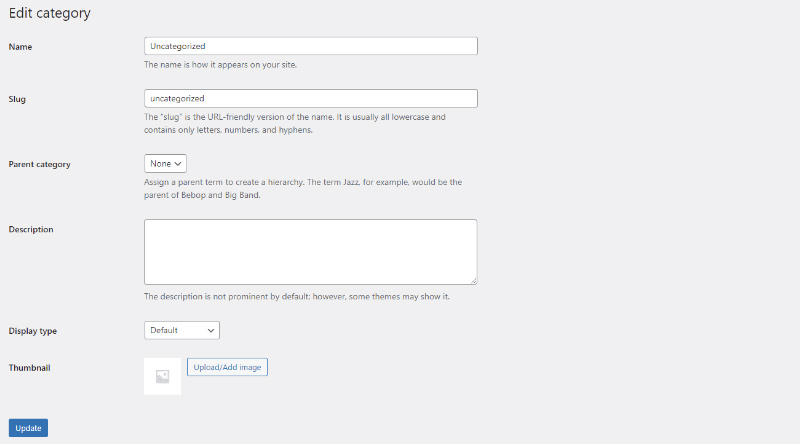
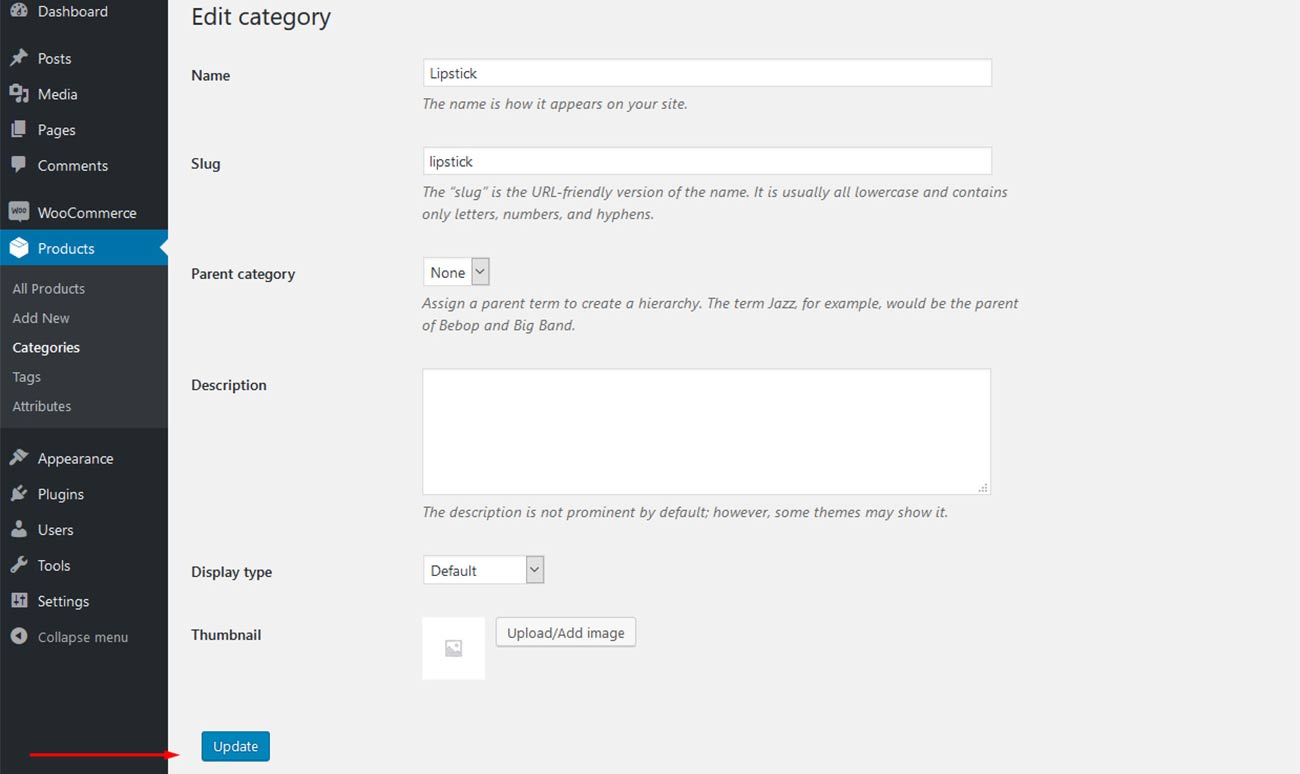
Now, rename your category and change its slug too.
Don’t forget to click on Update once you’re done.
To add more categories, just return to Categories, add a name for your new category and click on Add new category.
Step 3: Adding Subcategories
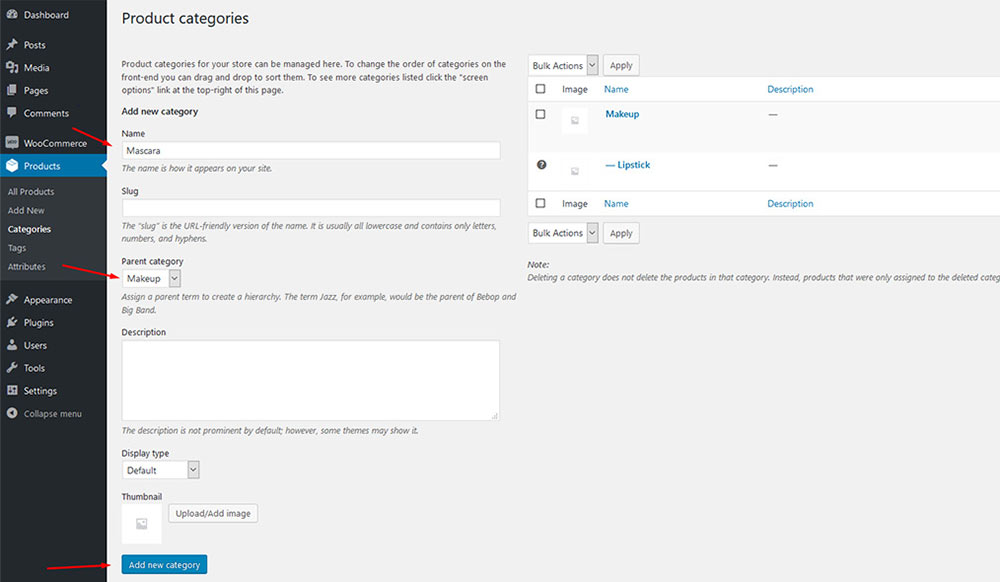
It’s always a good idea to add subcategories to your products. To do so, you need to pick a category you want to make your parent category. For example, you can add a “mascara” subcategory to the “makeup” parent category.
Your child categories will be marked with a dash, like this:
You can create as many subcategories or child categories this way.
Step 4: Adding Product Tags
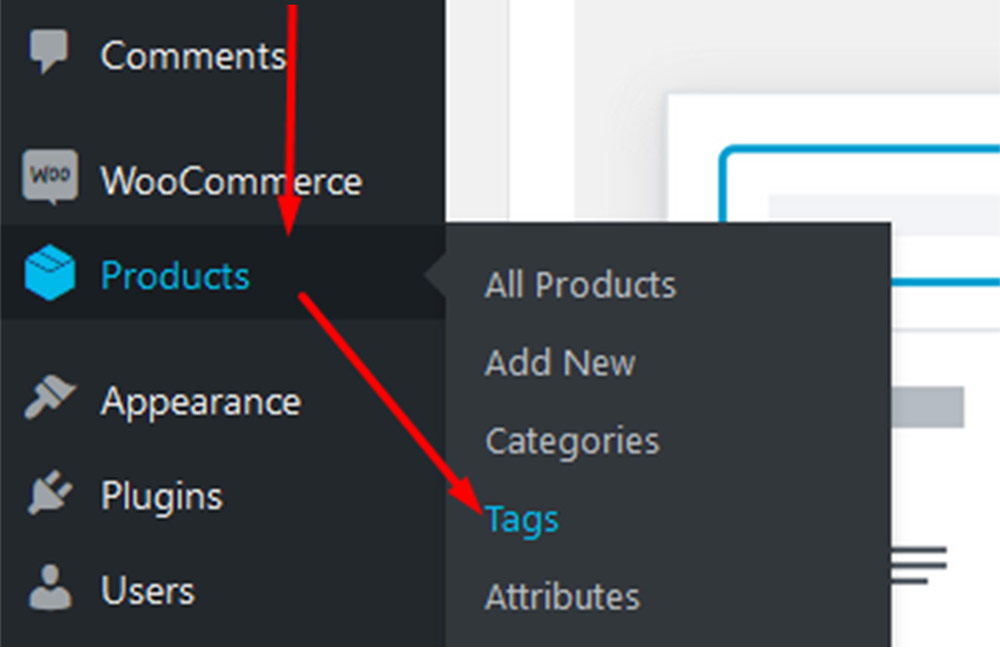
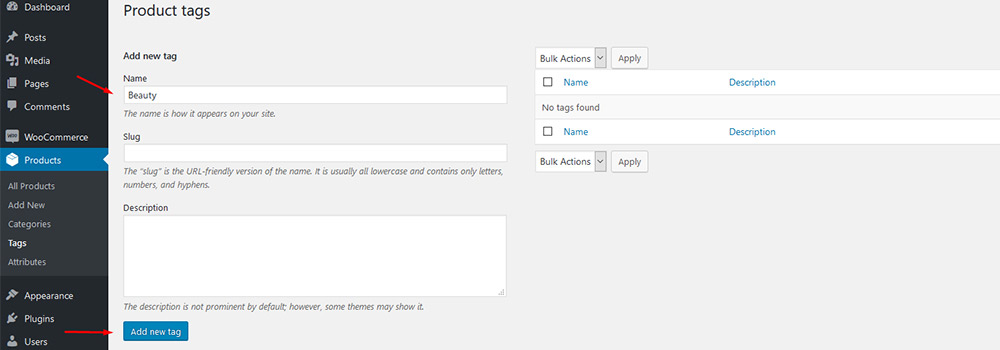
To add tags to products, go to Products and click on Tags. Again, you will see a familiar screen, similar to the one you use for adding tags to your blog posts.
Simply type in the name of the tag and click on Add new tag.
Use this method to add as many tags as you need. Also, note that adding tags and categories to grouped products is similar and equally important.
Conclusion
Adding tags and categories is a very important part of setting up your online store. Tags and categories help you organize your store better and they have an overall positive impact on your sales. Not to mention that tags in particular play an important role in search engine optimization (SEO) of your store, helping you rank higher and get better visibility.
We hope this article was helpful. If you liked it, please feel free to check out some of these articles as well!


