How to Use the WordPress Screen Options to Your Advantage
WordPress is a very user-centered platform which is one of the reasons why it is chosen by many, both beginners and experts. Therefore, its admin panel is designed in such a way to be as navigable and user-friendly as possible, with many options that make your site management a lot easier.
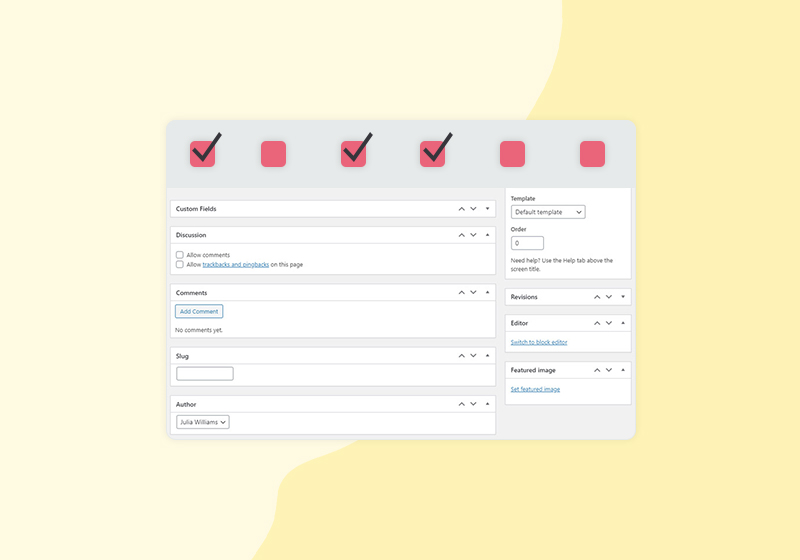
Screen Options are there to provide you, the user, with as much control as possible. They change from one admin screen to another and allow you to customize sections on the screen. The Screen Options menu features options for configuration of the view of the particular page in your admin area. You will see several checkboxes that enable you to hide and show different elements on an admin screen. Simply put, you can organize your admin view of a specific page by your priorities, and manage it accordingly. For example, you can choose not to see the discussion meta box or custom fields in the WP post edit screen. In this article, we will show you how to use the Screen Options in WordPress whatever the editor you are using:
It is not rare that even proficient WP users find themselves asking where are screen options in WordPress. In the Classic Editor, the screen options are available both on the page and on the post. And they often go unnoticed. Look for them in the upper right corner.
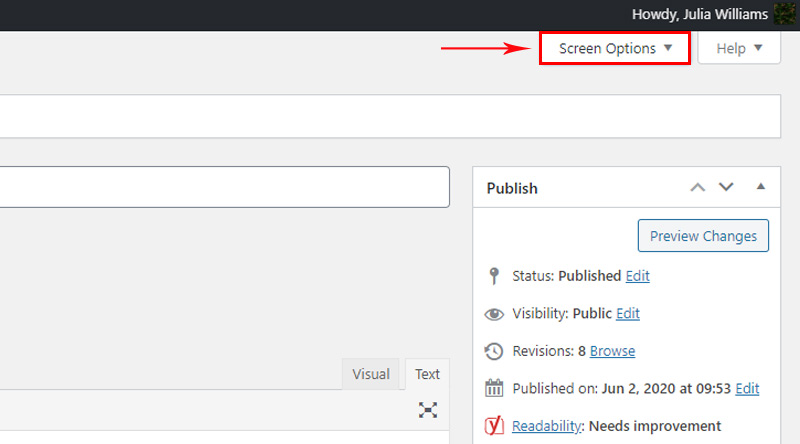
The settings on the page are different from the settings on the post as the post requires different functionalities.
These are the settings on the post:
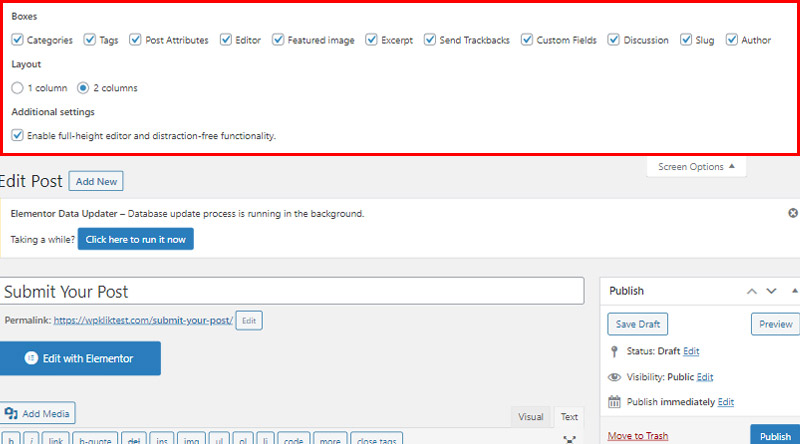
Now, let’s see what each of the options mean.
Revision – allows us to see all the changes and updated pages. You will have a neat overview of all the changes by dates. Plus, you can also undo changes you made on your WordPress page.
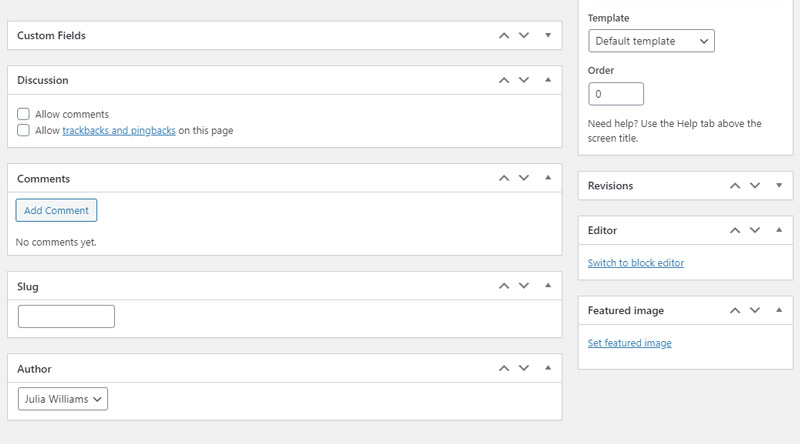
Custom field – this is the field where you can put some additional information about the post. For example, you can enter the info about the music that is playing while reading the post here.
Discussion – there are two settings within this option: Allow comments and Allow trackbacks and pingbacks on this page. If you are tired of spammy trackbacks and pingbacks, this is where you can disable them entirely.
Comments – this option allows you to see all the comments on a particular page.
Slug – this is where you manage and create slugs for the page.
Author – this is the field where you enter the author of the page. The user who created the page is the author by default, but you can also easily change the author of the page if necessary.
Page attributes – this option allows you to change the order of the pages, change page template, and set the page parents.
Featured image – here you add the featured image that will be visible on the page.
Editor – Since Gutenberg is now the default WP editor, if you are using Classic it means that you have installed the plugin to enable editing in the Classic Editor. This option is used to switch from Classic to Gutenberg editor within one page.
Layout – this option refers to the backend page layout, you can set how the page will look like in the backend.
Enable full-height editor and distraction-free functionality – when this option is on the height of the post editor automatically adjusts eliminating the need for the scroll bar. In case you want to have a scroll bar, simply uncheck this option.
When it comes to Post Settings, these are the options at your disposal:
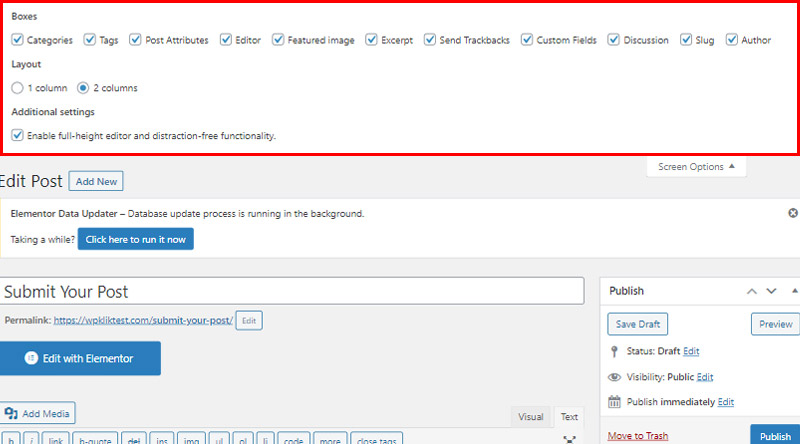
Categories and Tags enable you to assign the tag and category to a post.
Excerpt – is the field where you enter a brief description of the post topic.
Send Trackbacks – in case you can’t find the trackbacks meta box, you can check this option and WP will start showing the send trackbacks box below the edit area.
As we check and uncheck these options, we notice that certain areas are added or removed on the page in the backend. We can arrange these areas the way it suits us best.
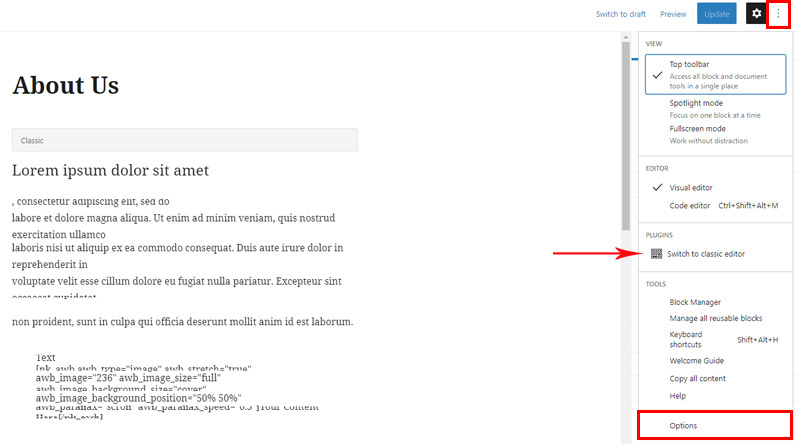
As for Gutenberg, the options are similar. You will see them in the More Tools & Options. In the drop-down menu itself, there is the Switch to the classic editor option – enables you to switch to the classic editor on the page. As we said, the Classic editor is not the default editor, but it is necessary to activate the plugin to have the option to edit the site in it as well. If you do not need it and you have not activated the plugin, this option will not be found in your settings.
All the other settings are in Options.
These are the settings for the page.
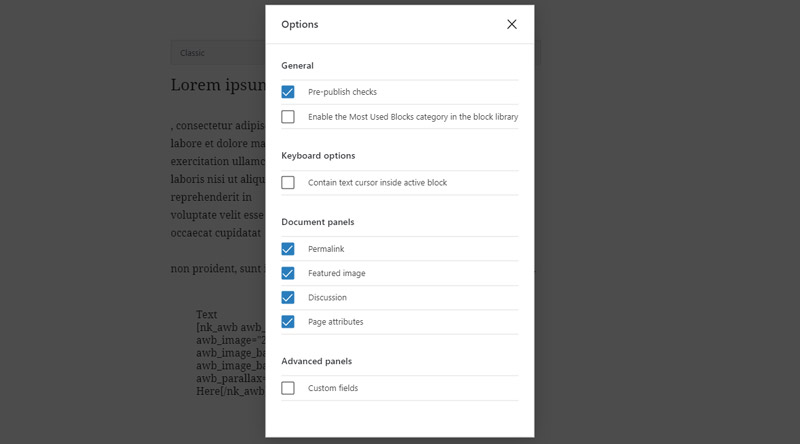
Let’s have a brief overview of the options that are left.
Pre-publisher checker – this allows us to see the page how it looks like before we publish it.
Contain text cursor inside active block – checking this option makes the Options modal dialog close immediately, but only when the block editor is in “navigation mode”.
One of the most interesting and useful options is the Enable the Most Used Blocks category in the block library – that enables you to group the most used blocks and create a Most used group.
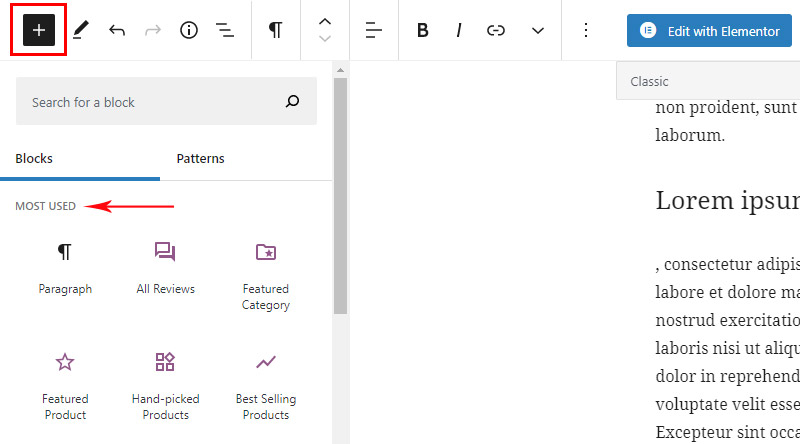
These are also the options that many people miss to notice and even have trouble finding, but they are in the same place where they would be in pages and posts.
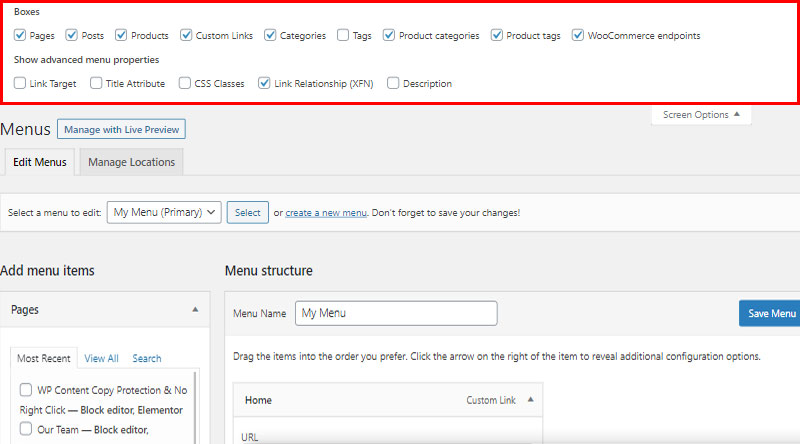
Boxes – when we create a menu, we actually add the already made pages, posts, and custom links in it. These boxes contain the list of everything that was ever created and we simply add it to the menu from here. Therefore, it is important to turn on all the boxes.
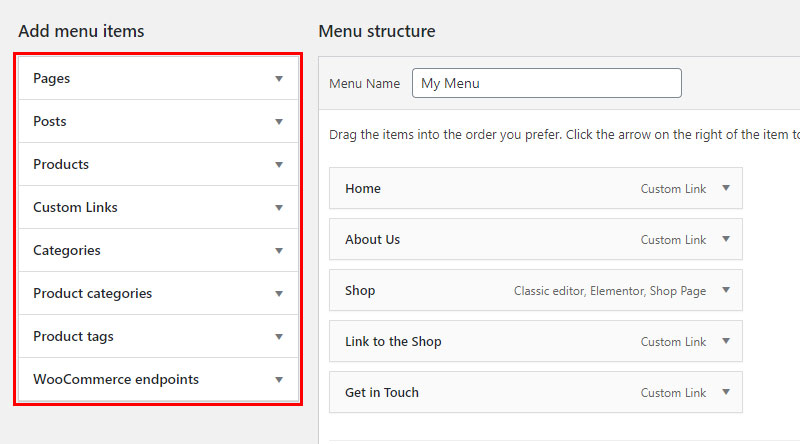
As you can see, WooCommerce endpoints and different product boxes appear as Boxes. But they only appear when WooCommerce is installed on your site.
Show advanced menu properties – this group of settings refers to the settings of the item itself in the menu:
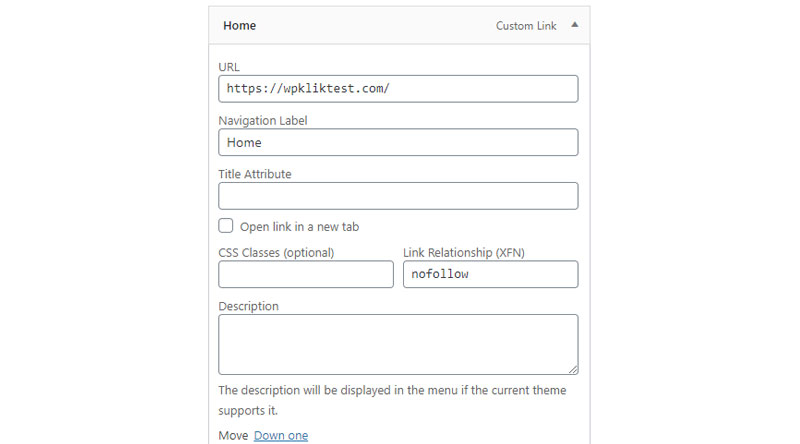
Link Target – controls whether your menu links open in a new tab or window when clicked.
Title Attribute – when you hover a mouse over the menu item a text shows up that helps the visitors to understand what this menu item is about.
CSS Classes – this is an advanced option that enables you to apply a CSS class to particular menu items.
Link Relationship (XFN) – XFN attributes are often used to show how you are related to the authors/owners of the site to which you are linking. In this box, you can specify the relationship you share with the authors of the page to which you’re linking. XFN relationships are optional for the links. You can leave the XFN box empty and all your links will still work.
Description – if the theme you are using supports it, the description will be displayed in the menu.
If you are using the Elementor page builder, we want to note that all the options on the page and post that we talked about above, in a way, have something to do with Elementor too. Namely, Elementor is not a default WP editor but an additional one. Even when the Elementor is installed on the site, there is still the possibility of editing the content using the default editor, ie Gutenberg (and the classic one if you install the adequate plugin, although it is really not necessary nor recommendable to have three editors).
When adding a new page WP first takes us to the default editor. Before switching to the Elementor, we can turn on all the screen options in the default editor and adjust what we need. For example, we will not be able to change the author from Elementor.
So it is best to understand the Elementor as an add-on while some other options are set up with the default editor.
In Conclusion
As you can see, using the WP screen options can make managing your site a lot more easier and effective. Customize your admin panel to create the perfect work environment for yourself and feel free to share your thoughts and experiences on this topic with us in the comment section below!
We hope this article was helpful. If you liked it, feel free to check out some of these articles as well!


